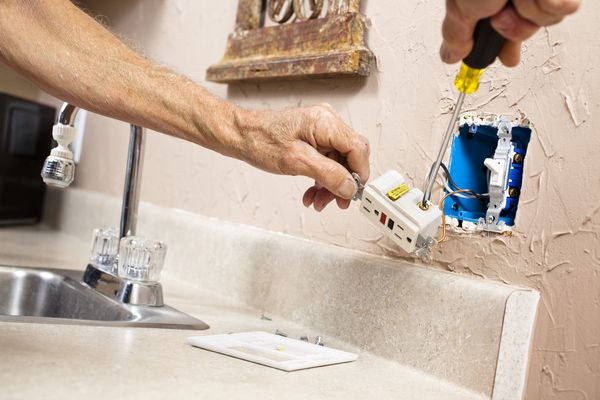
INSTALL GROUND FAULT CIRCUIT INTERRUPT OUTLET
To better understand what is involved in installing a ground fault circuit interrupter (GFCI) in your home, you’ll first need to have an understanding of basic electrical wiring. If you feel at all uncomfortable about working on an electrical circuit, then it might be best the call a professional. Understanding basic circuitry, knowing where to turn circuits off and on, being able to test circuits and keep track of what goes where are all essential and important.
As with any and all electrical projects, be sure to turn the power off to anything you are working on. Electrical safety should always be number 1 on your list.
Difficulty:
Easy
Time Required:
15 Minutes
Turn Off the Power
Before you begin any electrical project, go to the electrical panel and shut off the circuit that you’ll be working on. Sometimes, not always, the electrician will mark the panel, on the inside of the door with the location the each individual breaker supplies. If it is marked, turn off the correct circuit. If it is not marked, plug something into the circuit and one-at-a-time start shutting off breakers. When the device that you plugged in goes out, you may have found the circuit.
Check the Circuit
Always double-check the circuit with a tester or meter to be safe! Never assume that, just because the light went out, the circuit is off. Maybe, just maybe the bulb burned out and you happened to be at the right place at the wrong time.
Mark Each Wire
Now that the circuit is safe to start work, remove the existing outlet cover and then the outlet. Do yourself a favor and get a pencil and paper so that you can mark down how everything is connected. If you have a roll of masking tape, mark down things like “right top side hot wire” and you’ll be able to place these right on the wires themselves.
Use the tape and label each wire, paying close attention to what color screws each connect to. This will eliminate any guesswork when installing the new device.
Replace the Outlet
This step is unusually specific. A regular outlet has two hot and two neutral terminals. These are common, meaning you can connect to either of the two screws for the "hot" or "neutral" connection. For the GFCI outlet, things get a little more interesting. There are two separate connections, line and load connections.
The power comes in on the "line" connection and out on the "load" connection. Unscrew the wires from the outlet and remove. If you’re reusing the existing wire feed, connect the new device to the GFCI outlet. The brass terminal is for the “hot” wire. This is usually the black or red wire.
Connect the white wire to the silver screw. This is the neutral connection. The bare or green wire is the ground connection. Place it around the green screw. When you have connected all the wires successfully, give the entire side of the outlet a wrap of electrical tape. This will eliminate the screw from touching either the side of the box or a stray wire when reinstalling.
Install the Outlet
Press the outlet into the box before installing the outlet with the screws provided.
You may have to carefully push and bend the wires back into the box to make everything fit. Now install the cover plate that came with the outlet and your installation is complete.
Turn on Power and Test
Once you’re satisfied, go back to the electrical panel and turn on the circuit. Go to the GFCI and press the reset button. Now use your tester to check the circuit. You can also use a lamp or any small appliance to see if power is restored.
Note: Always make sure that the power is off before performing any electrical project! Safety first!
What You Need
Flat Blade Screw Driver
Phillips Blade Screw Driver
Wire Strippers
Circuit Tester
Tape
Pen or Pencil


Comments
Post a Comment